Friday, February 20, 2009
You Party Animal!
Saturday, February 14, 2009
Sale A Brate Good Times!
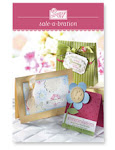
Fun day playing with my Saleabration stuff:
This card was really fun. I used the top note die to cut the Raspberry Tart paper for another project and used the "extra" for this card. Also used is Rose Red, Kiwi Kiss markers with the stamp from the "Yummy" set and Summer Sun and Regal Rose watercolor crayons with Botannical Blooms. I misted some water on the solid stamps and colored directly on them. I masked the something special stamp with a post it pad . I used the butterfly from Kind Thoughts, stamped it on the card and on a post it pad. I cut out the post it pad and used it as a template for the butterfly, folded it in the middle and used a little crystal effects to glue it to the stamped one.
And then used a retired envelope template and the SAB paper for the envelopes. I must admit that I likes this set much better than I thought I would from the mini. I also used a button from the Latte collection and a build a brad. (those are really fun if you haven't tried them yet.) And of course the matching punches and the scallop edge punch.
I thought this was a great card for a wedding now that Valentines is past.
Got the idea here. I love the softness of pink pirouette. Again I used the texturz plates. They are great in that you can emboss an area up to 5 1/2 x 6 but some of the plates do not emboss as deeply as the cuttle bug folders. All in all I like them and think they are a good deal. I heat embossed the hearts using the white craft pad on the pink and inking up the heart in versamark and then tapping it once on the pink piroutte pad and embossing it with clear on the white.
If that sounds like Greek to you let me know.
I also used my scallop envelope die and "Join the Cheer" Sizzlet strip using only the word "Love"
Don't forget the white taffeta ribbon... I love that stuff. Need to get the pink too.
It's really pretty in person where you can see all the textures. I need to figure out how to take better pictures so you can see that stuff.
Oh well, I better get my house cleaned up now... back to reality
Thursday, February 5, 2009
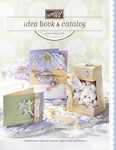
New Catalog
The new catalog has been out for almost two weeks now, I'm a little slow.
Here are some cards I've made:
Petal pizzazz pg. 90
Cocolate Chip, Kiwi Kiss, Baja Breeze, Pink Pirouette,
Clear Rhinestone brads (p174), Half pearls from the pretties kit, Rubons from Small Talk
Monday, January 12, 2009
Valentines Bundle
Yea! I got to play this weekend
with the Valentines Bundle that's on sale for a few more days.
Check out what I made:
A cut little box with my scalloped envelope die:
with the Valentines Bundle that's on sale for a few more days.
Check out what I made:
A cut little box with my scalloped envelope die:
Made with the DSP, stamp set and punch that comes in the Valentines bundle
Riding Hood Red, Pirouette Pink and Close to Cocoa
Monday, December 15, 2008
Christmas tags
Here are some Christmas tags we did recently using all kinds of punches.
This is not my original idea but I think I got it from Stampin' UP
they were designed by Mercedes Weber and altered slightly by me (of course)
The colors are Baja Breeze, Kiwi Kiss, Riding hood Red, close to cocoa, chocolate chip, Pumpkin pie, black, Blush blossom and for the penguin's scarf Bella Blooms? dsp.
I used a sizzix die in my cuttle bug to make the tags.
Hint - all small pieces were attached with liquid glue, place a dot of glue where you want it and use the tip of your scissors or a paper piercer to move the tiny dot into place
I used the new large oval punch, boho blossoms punch, 1/2 inch circle, a standard hole punch, and 1/4 inch circle, boho blossoms punch, and large oval and 3/4 inch circle for the antlers.
Frosty used a 1 1/4" square, word window, 1 3/8"circle, double circle, large star (one point only) and the boho blossoms punch for the holly
hint- glue the leaves on first and then add the berries.
Wednesday, November 19, 2008
Can't leave well enough alone
As I typed this title I realize that this saying probably reveals my age because I don't think it's used much any more.

While I was making these cards according this tutorial
I realized that I had two issues with the design of the card.
#1 I really like a card to "fit well" in the envelope (same general size and shape)
and #2 there is no place to write on the card.
Also I guess a sort of #3 is that I really like to enjoy both sides of double sided paper.
So... although many love these cards I "couldn't leave well enough alone"
I mounted my folded paper on a piece of cardstock 5 5/8 square
I attached the corners that are cut off and put a piece of coordinating cardstock
underneath the spring part to write a note to the recipient.

 I realize these are not huge changes but they made me happy!
The stacked cupcakes have sparkles on the frosting and on the single cupcake
I added crystal effects to give it a cool glossy raised surface.
While I was making these cards according this tutorial
I realized that I had two issues with the design of the card.
#1 I really like a card to "fit well" in the envelope (same general size and shape)
and #2 there is no place to write on the card.
Also I guess a sort of #3 is that I really like to enjoy both sides of double sided paper.
So... although many love these cards I "couldn't leave well enough alone"
I mounted my folded paper on a piece of cardstock 5 5/8 square
I attached the corners that are cut off and put a piece of coordinating cardstock
underneath the spring part to write a note to the recipient.
The stacked cupcakes have sparkles on the frosting and on the single cupcake
I added crystal effects to give it a cool glossy raised surface.
The whole tree layer is covered in glitter.
If you enlarge the picture you can see it better.
I also realized that I don't have a sentiment on here...Oops
Details on how to do this one in class Nov. 20
Oh yea, I figured out a way to fold it with no measuring or scoring!
Friday, October 10, 2008
Wanna Swap?
Are you in need of cards?
Swap with us.
We need at least one more person for this month's swap.
Make 10 of the same card and swap the out with others who have done the same thing.
Here are the cards we have so far:

Swap with us.
We need at least one more person for this month's swap.
Make 10 of the same card and swap the out with others who have done the same thing.
Here are the cards we have so far:
Just for fun I am going to pick a random person who leaves a comment on this post to get a full set of swap cards. (With the amount of comments I've gotten so far you have a really good chance to win.) Let me know if you want to swap with us!
Subscribe to:
Posts (Atom)


